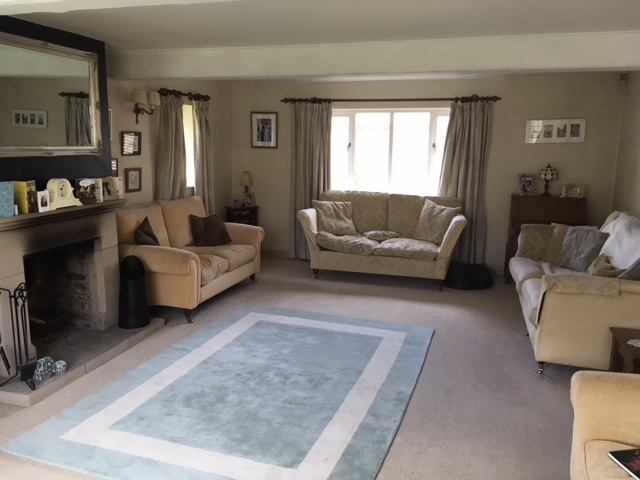
My client got in touch with Ava Rose Interiors needing some inspiration to change a large living area into a cosy space for the family to enjoy together. It was a large room, over 7m long & nearly 5m wide, with 4 windows and the original front door to manage in the scheme. We were advised that the fireplace was to stay & no changes to the windows or door but everything else was up for grabs. We had a reasonably generous budget to work with, to include furniture, lighting, plumbing, carpentry, carpet and general decoration.
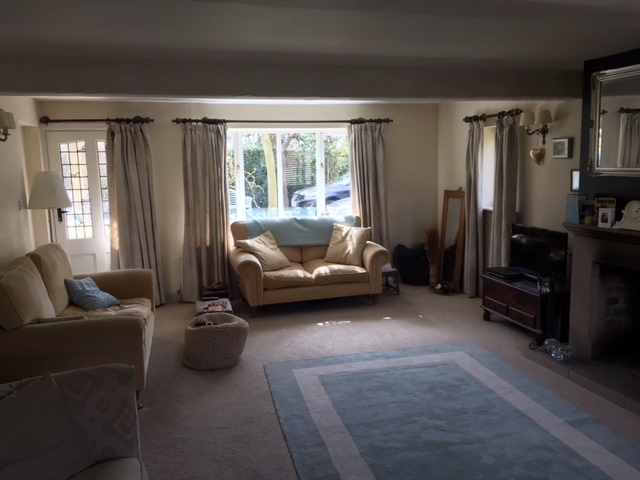
The client wanted a look that was broadly classic with a modern twist; THE perfect clients, they were willing to take some risks with the scheme to achieve wow factor!
After meeting with the clients at the property on 2 occasions, we had a good grasp of their vision for the room, general likes and dislikes, lifestyle and so forth. They were cautiously optimistic about going for a deep colour on the walls but the mood board helped to bring the ideas together in a visually cohesive way.
Proposed Ideas
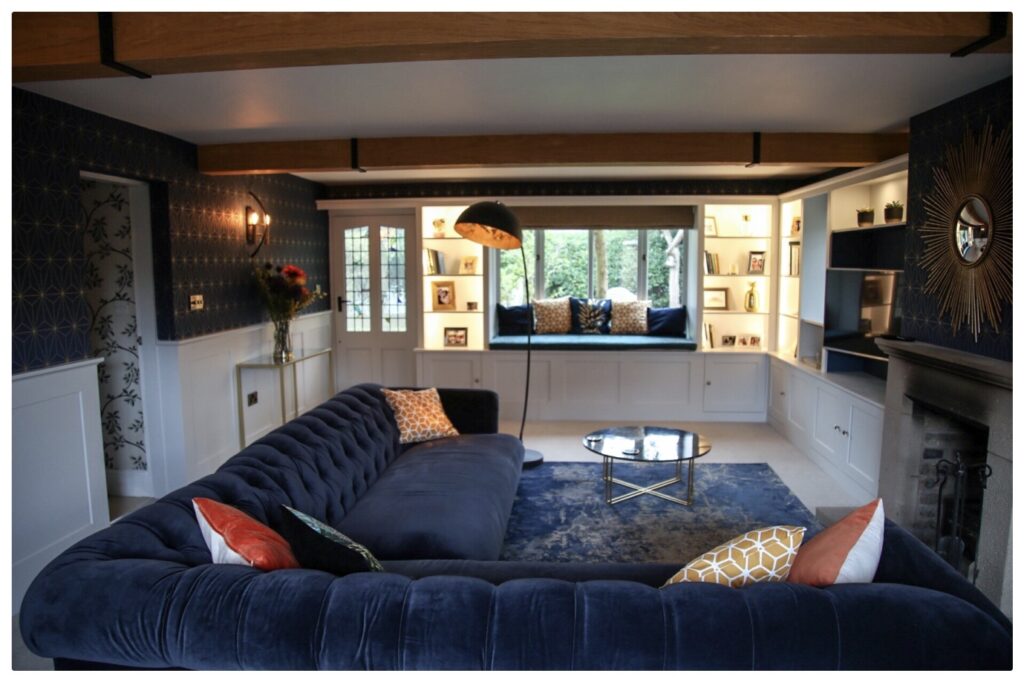
- Build a window seat & shelving around the left hand window maximising the view onto the lovely established garden
- Add dado height wood panelling around the entire room to a) balance out the carpentry around the one window and b) balance the dark colour & pattern of the wallpaper to be hung above
- Build barn doors to the opposite window, operated by a wrought iron track system. This window would soon be looking onto a neighbours building project so we wanted a contemporary way to block this out whilst balancing out the carpentry in the room
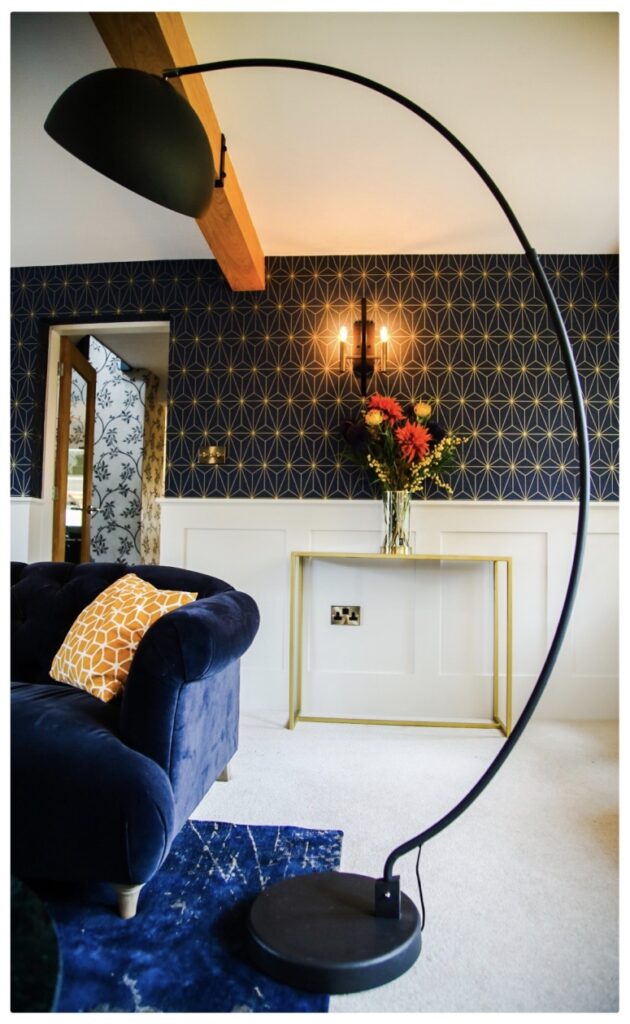
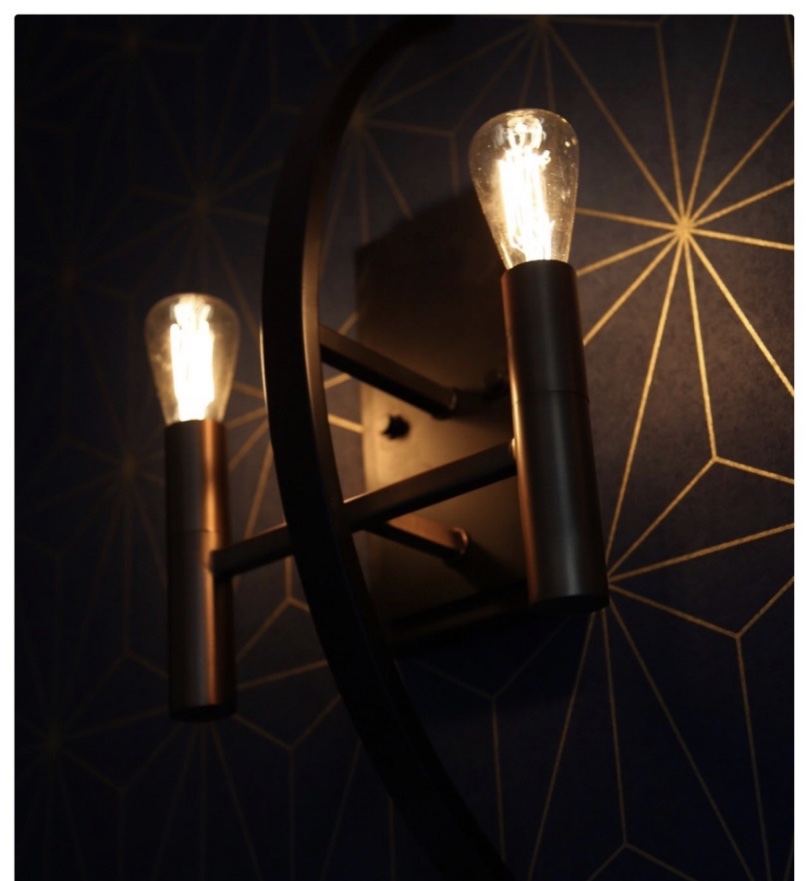
- The low ceiling height narrowed our lighting options as there wasn’t height for pendant lighting, we wanted to avoid spots and coving lighting was cost prohibited. We kept it simple, replaced the wall lights with a more modern design, added an arc floor lamp with hidden cables and incorporated warm LED strips into the cabinetry.
- Replace the carpet with a new, neutral wool mix
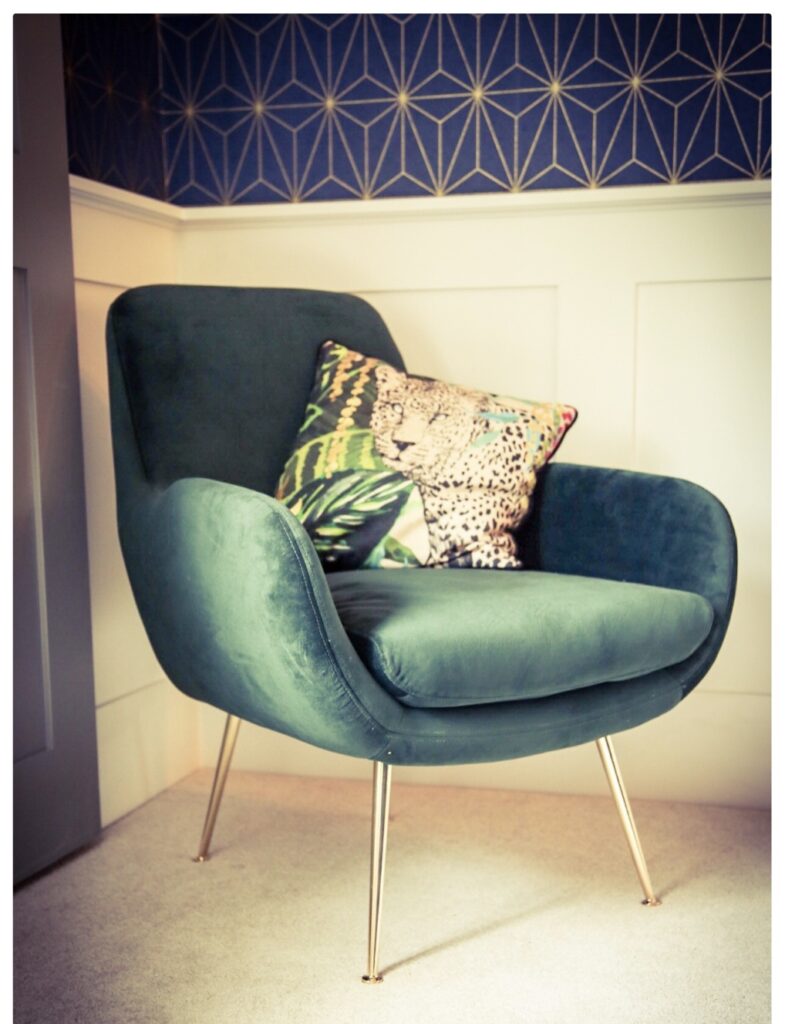
- Source new practical, yet contemporary furniture

A floor plan and budget breakdown / shopping list was created to supplement the design.
The Refurb Process
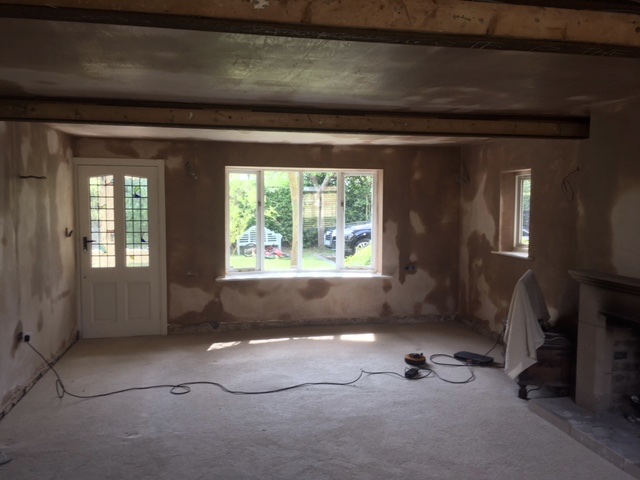
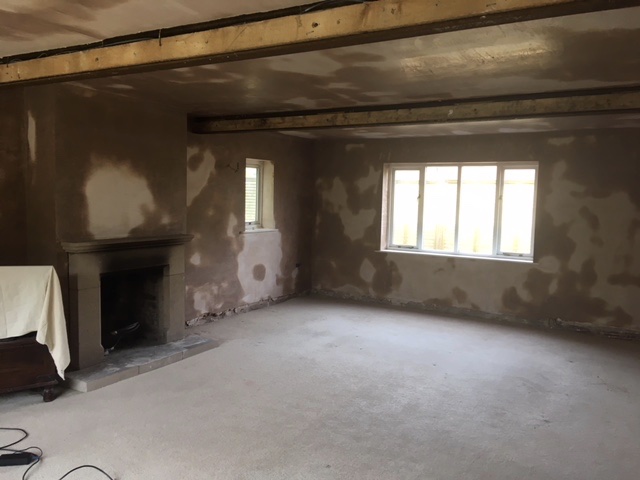
Once we had the go ahead, the first step was to clear the room ready for plastering. Being an old property, the walls were in need of some attention. We also decided to strip the cladding off the beams in the hope of finding original oak beams, unfortunately not to be, so we researched a plan B.
The freshly plastered walls gave a lovely smooth surface for decorating & a good base for the Carpentry ideas we had in our minds! The room was ready for its transformation!
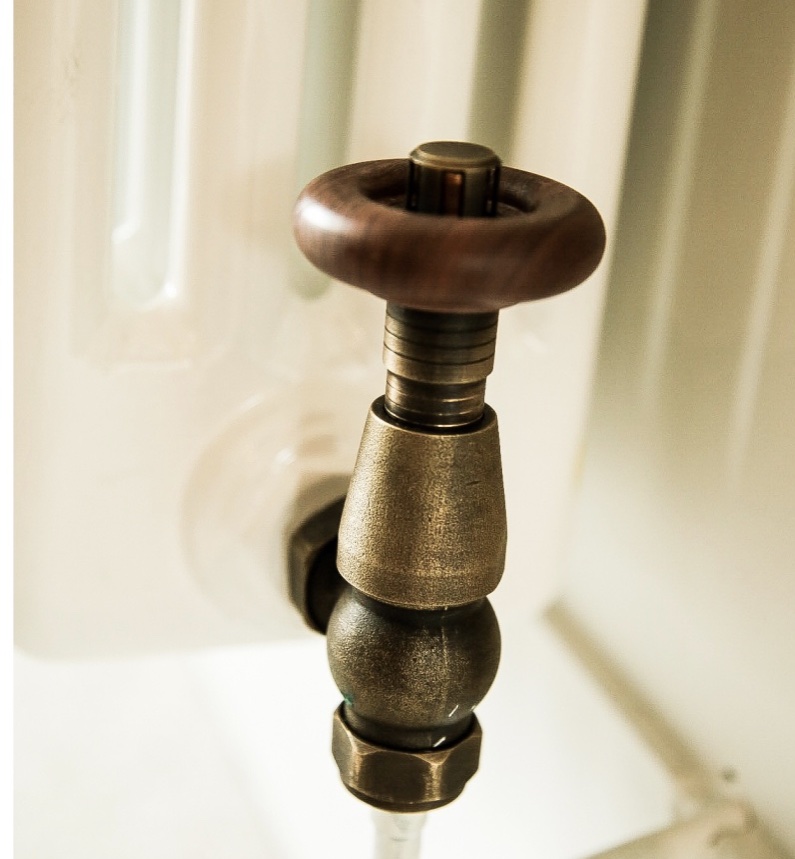
We removed the inefficient long radiators under each window and replaced with one large column radiator which would provide the same level of heat with improved efficiency. First fix of the pipes at this stage. The position of the new radiator was moved to the wall away from the windows as we had big plans for those!
Next up was the lighting first fix. The ceilings are low and the only light source in the room was via wall lights. We investigated different options to introduce ceiling lighting; via coving lights or fully recessed spots. However, cost constraints made these options prohibitive. A joint decision to simply replace the wall lights with something more modern was made. Additional lighting would be introduced via an arc floor lamp & LED’s within the cabinetry shelving.
Once the preliminary prep work was complete, it was time to start the Carpentry. We were super excited by this phase of the refurb; where the room would really start taking shape & come alive. The Carpenter we have worked with across many projects. He is able to quickly get on board with our ideas & really bring them to life, YAY.
First to be created was the window seat, depth, height, storage options, overall design all had to be scoped out in finite detail. Plans upon plans were drawn up until we were happy to start the task. Once we started, it was clear the Carpentry was going to steal the show!

Once finished with the shelving & window seat, our Carpenter made a start on the wall panelling, then finally the barn doors & the cladding for the 2 long beams (our plan B to hide the 2 steels).
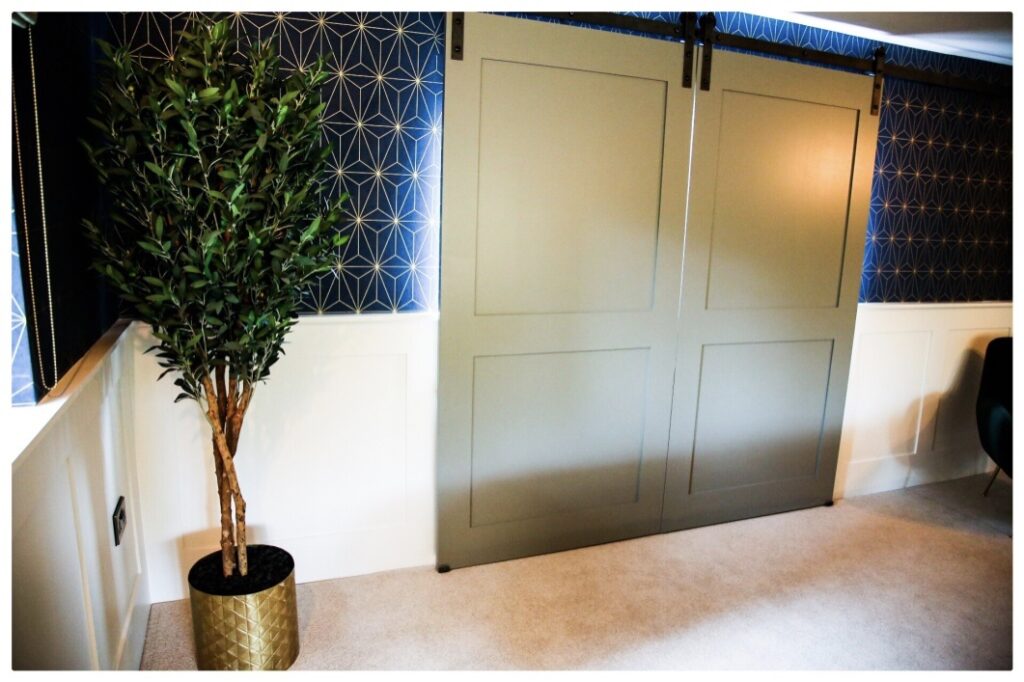
Next trade to be brought in is the decorating team. We chose this Cole & Son’s geometric wallpaper (Icons) on the walls above the panelling. A soft white emulsion for the panelling, window seat & shelving to offer a lovely contrast to the deep blue of the wallpaper. The barn doors were painted in a lovely warm grey (Farrow & Ball’s Charleston Gray). Mounted on a wrought iron barn door track, the doors slide across easily & offer a convenient way to obscure the building work going on closely next door.
Towards the end of the decorating, the plumber returned to install the new column radiator and the electricians came back to install the new wall lights, install the LED tape into the new shelving & channel the lead for the new floor lamp. All that was now left to do was to fit the carpet, roman blinds & start to bring in & assemble to furniture.
This was a lovely room to make over. The clients were very accommodating & allowed us a large amount of autonomy. The overall process, from start to finish took 4 weeks so didn’t leave the clients without their Living Room for too long. I think the new room was worth the wait.
Below are a selection of the after photographs to show the journey this make over took. The room is unrecognisable from where it began.